Your Guide to Drywall Repair, Painting & Insurance
A roof leak can be every homeowner’s worst nightmare. It’s not just about the dripping water—it’s the damage it can leave behind. From ruined drywall to potential mold and structural issues, things can quickly go from bad to worse if you don’t act fast. But don’t worry, we’ve got you covered!
This guide will walk you through everything you need to know about fixing drywall, repainting, and even navigating your insurance after a roof leak. Let’s get your home back to normal, step by step.
Step 1: Take Action ASAP – Assess the Damage & Document Everything
The moment you notice a roof leak, it’s time to spring into action. The sooner you catch it, the easier it’ll be to fix. Here’s what to do:
- Check for the Signs
Look for common red flags like:
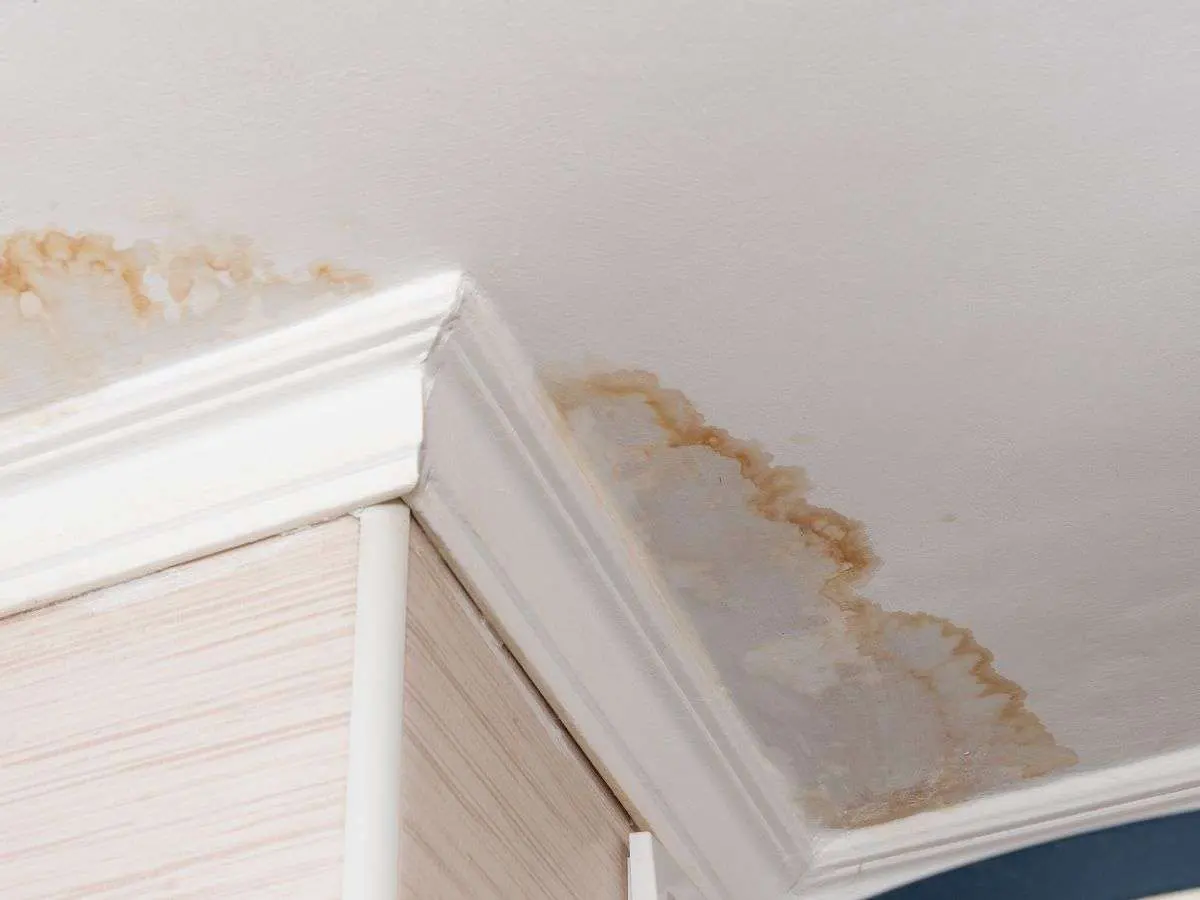
- Stains or Discoloration: Yellow or brown spots on your walls or ceiling.
- Sagging or Bulging: Swollen or drooping drywall is a big warning sign.
- Peeling Paint or Wallpaper: Water can loosen finishes.
- Soft, Spongy Areas on the Wall: If it feels squishy, it’s taken on water.
- Musty Smells: That’s a hint there’s moisture—and maybe mold—hiding somewhere.
- Inspect Nearby Areas
Water doesn’t always stay in one place. Check around the initial damage for any signs the leak has spread.
- Take Photos & Videos
This step is super important! Before you clean up or start repairs, document everything. Clear photos and videos of the damage will be your best friend when it’s time to file an insurance claim.
Why move fast?
Waiting too long can lead to mold (which is bad for your health) and make repairs more expensive down the line. Acting quickly will save you time, money, and headaches.
Stay tuned for the rest of the guide, where we’ll dive into drywall repair, painting tips, and insurance hacks to make this process as smooth as possible. You’ve got this!


Step 2: Know Your Insurance & Start a Claim
Once you’ve gathered the initial details:
- Check Your Homeowner’s Policy: Take a close look at what’s covered for water damage. Most policies cover things that are sudden and accidental (like storm damage), but they typically don’t cover issues caused by ongoing problems (like ignoring a slow leak for months).
- Call Your Insurance Provider ASAP: Don’t wait too long to report the damage. If you delay, your insurer might say the damage was due to wear and tear or neglect, which could get your claim denied.
- Work with Your Adjuster: Be ready to share your documents and work closely with the insurance adjuster. Keep track of all your conversations and any expenses along the way.
- Think Twice About DIY Repairs: Jumping into major fixes, like repairing big leaks or drywall damage, without checking with your insurer first could cause problems with future claims. Better to wait and make sure everything’s squared away!
Step 3: Fix the Roof Leak—Stop the Problem at Its Source!
Whether your insurance claim gets approved or not, you’ll need to call in a professional roofer to fix the problem. It’s super important to address the root cause of the leak before worrying about any interior repairs. Otherwise, you’re just putting a band-aid on the issue, and the damage will come right back.
- Find a Reliable, Licensed Roofer: A trustworthy pro will pinpoint the issue and fix it properly. If the leak is storm-related, they can even help with your insurance claim.
- What Causes Interior Roof Leaks?
- Missing or damaged shingles
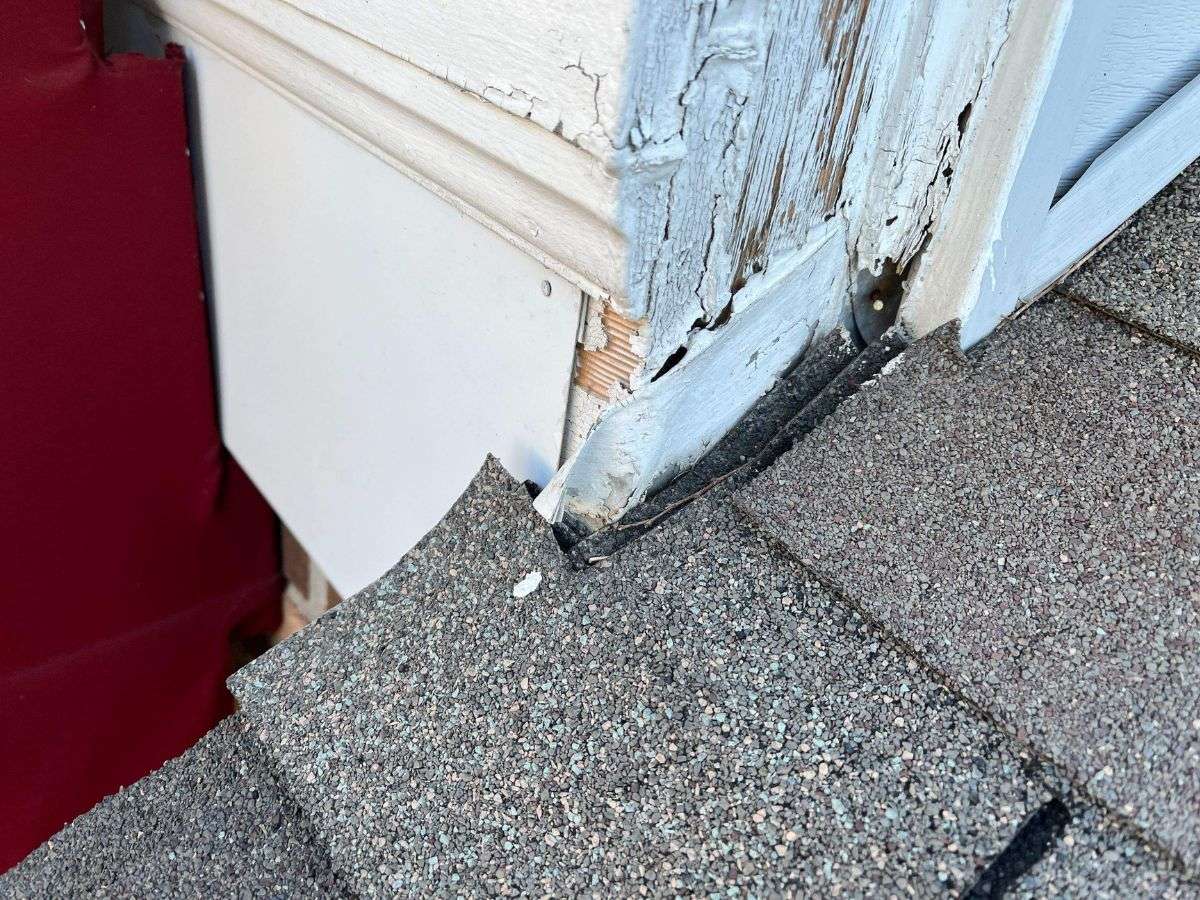
- Poor installation or bad flashing
- An aging roof wearing down over time
- Hidden Problems: Cracks in siding, chimney flashing issues, bad window seals, plumbing or HVAC line leaks, fire suppression line problems, or clogged gutters. A full inspection will help uncover all the culprits.
Remember, don’t waste money fixing up your interior until you’re 100% sure that the leak is taken care of!
Step 4: Be Patient – Test the Repair
It might feel a bit counterintuitive, but this step is super important.
- Let It Weather a Few Storms: Hold off on drywall repairs and painting until your roof repair has been tested by a few good rainstorms.
- Why Bother Waiting? Many contractors only guarantee their fix to the source of the leak, not any interior damage if the repair doesn’t hold. Waiting makes sure the leak is really fixed, saving you time, money, and frustration down the line.
Step 5: Drywall Repair & Painting – DIY or Call in the Pros?

So, the leak is fixed—great! Now, it’s time to take care of the interior.
- Thinking DIY? Sure, fixing your drywall yourself might seem like a budget-friendly option, but it’s trickier than it looks. If you miss any water-damaged material, mold could sneak in. Plus, getting that smooth, professional finish with taping, mudding, sanding, and painting? Let’s just say it takes more practice than you’d expect. Common DIY hiccups include visible seams, clumpy putty, and paint that doesn’t match.
- Why Hire a Pro Instead?
- They know their stuff: Pros can spot and get rid of all damaged materials (even hidden ones like insulation).
- Flawless results: They’ve got the tools and skills to deliver a perfect finish that lasts.
- Safety first: They know how to handle moldy materials without risking your health.
- Quick and easy: They’ll get the job done faster and often guarantee their work.
Pro tip: If there’s a lot of damage or signs of mold, it’s a no-brainer—hire a professional.
What Professionals Do During Drywall Repairs
Here’s what you can expect when you bring in the experts:
- Remove damaged materials – Water-damaged drywall and insulation are taken out.
- Dry everything out – Fans and dehumidifiers ensure the area is completely dry to avoid mold.
- Deal with mold (if needed) – Any mold is treated and removed professionally.
- Replace insulation – New insulation goes in.
- Install new drywall – Sheets of drywall are cut and installed properly.
- Tape and mud the joints – Multiple layers of joint compound are applied for a seamless look.
- Smooth it out – They’ll sand down the dried compound for a flawless finish.
- Prime the drywall – A good primer is applied to seal the drywall and prep it for paint.
- Paint it up – At least two coats of paint go on to finish the job beautifully.
Wrapping It All Up
Dealing with a leaky roof and its mess isn’t fun, but it doesn’t have to be overwhelming. By tackling things step by step—from inspecting the damage and working with your insurance to fixing the leak and restoring the interior—you can handle the situation like a pro. The key is to make sure everything is dry and properly repaired to prevent mold or other long-term issues.
While minor repairs may be doable on your own, bigger jobs are best left to a professional repair service. They’ll make sure your home isn’t just looking great but is also safe and sound.
If you’re in Tennessee or Georgia and need help, Roof MD has your back. We team up with top-notch interior restoration experts to handle everything, from the roof repair to the drywall patch, and final painting. Plus, we’ll work with your insurance to help you get coverage if you qualify.
Our goal? To take the stress out of the process and leave your home in perfect shape. Ready to get started? Visit our roof inspection page and book your free estimate today!
