Chimney Flashing and Roof Leak Prevention
Chimney flashing plays a key role in keeping your roof watertight, sealing the area where your chimney meets the surrounding roof materials. It’s essential for protecting your home from water leaks that could lead to expensive repairs or even structural damage.
However, chimney flashing is often overlooked, poorly installed, or not maintained properly—leaving your roof vulnerable to water issues.
In this post, we’ll break down what chimney flashing does, the key components of a strong flashing system, how it’s installed, and common problems you might encounter. By the end, you’ll feel confident about why taking care of your chimney flashing is so important for keeping your home safe and sound.
What is Chimney Flashing?
Chimney flashing is a protective barrier that keeps water from sneaking into your home where the chimney and roof meet. Made from tough, weather-resistant materials like metal (think aluminum, galvanized steel, or copper) or specific roofing membranes, chimney flashing is built to withstand all kinds of weather. When installed correctly, it ensures this vulnerable area stays watertight and secure for years.
A good chimney flashing system isn’t just one piece—it’s made up of multiple components working together to create a long-lasting, moisture-resistant seal. Here’s a quick breakdown of these crucial parts:
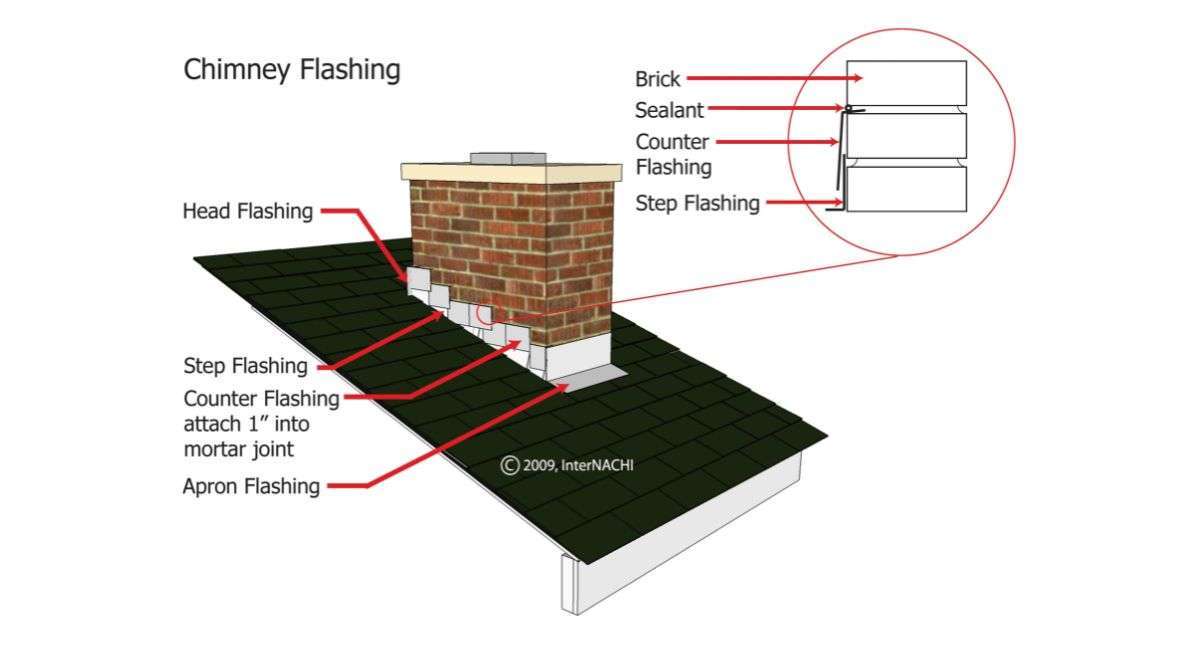
- Base Flashings: These are placed at the base of the chimney and form the foundation of the flashing system. They block water from seeping in where the chimney meets the roof. Base flashings are key to protecting against leaks and ensuring your roof stays solid over time.
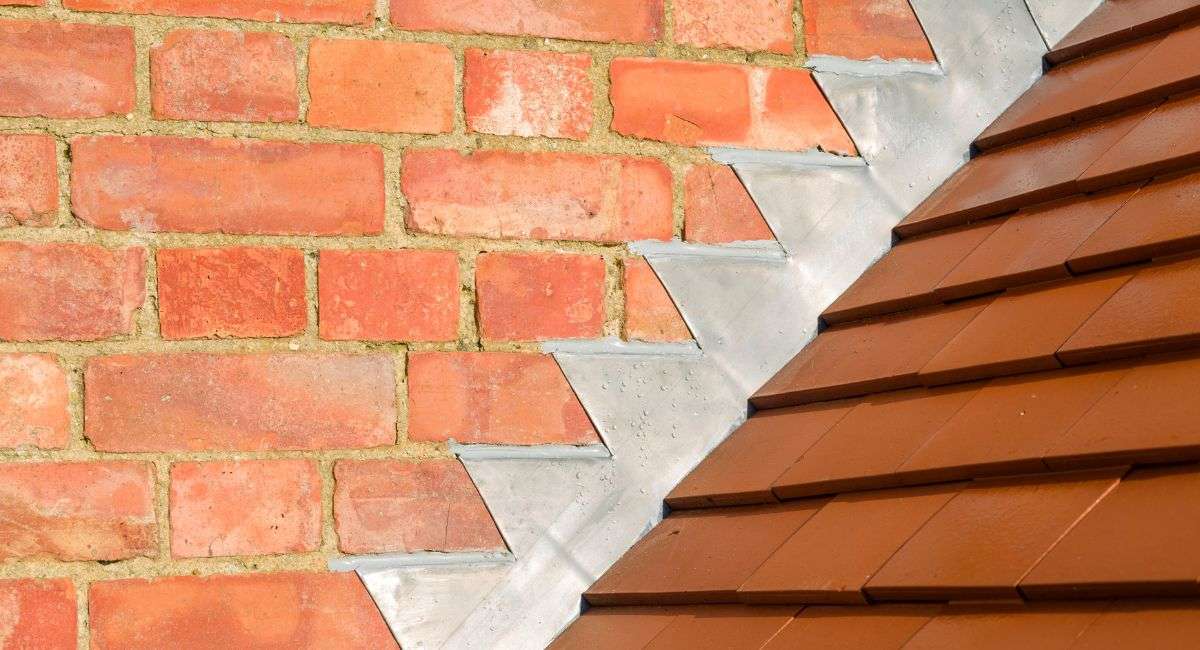
- Step Flashings: These are individual pieces of metal installed along the sides of the chimney, overlapping like shingles. Their layered design helps direct water safely away from the chimney and roofline, preventing leaks and keeping everything dry.
- Counterflashings: Positioned over the top edges of the base and step flashings, these add an extra layer of protection. Counterflashings seal the system, stopping water from getting under the primary flashings. They’re often embedded into the chimney mortar for added strength and durability.
- Chimney Saddle or Cricket: For larger chimneys that are prone to water pooling, a saddle or cricket is added. This little structure helps redirect water away from the base of the chimney, preventing leaks caused by pooling or overflow. It’s extra helpful for chimneys on steep roofs where water flows faster.
The main goal of chimney flashing is to create a strong, watertight barrier that keeps water out and protects your home from damage. Besides stopping leaks, flashing prevents water-related problems like rotting wood, mold, and weakened roof structures. Maintaining your chimney flashing is a simple way to extend the life of your roof and avoid costly repairs. Regular inspections and quick fixes can help keep your flashing system working perfectly, so you can relax during heavy rain or snow.

How is Chimney Flashing Installed?
Installing chimney flashing might sound technical, but it’s a straightforward process when done with care, precision, and attention to detail. It’s all about keeping water out and protecting your home from potential damage. Here’s how it works step by step:
- Base Flashings: First up, base flashings are installed where the chimney meets the roof deck. Think of these metal pieces as the foundation of the flashing system—they’re your home’s first line of defense against water. They’re carefully measured and fitted to make sure there are no gaps for water to sneak in. This step lays the groundwork for a strong, waterproof connection between your roof and chimney.
- Step Flashings: Next, step flashings are added along the sides of the chimney. These overlapping metal pieces follow the shape of the chimney and roof, creating a staircase-like pattern. Each piece is layered with the roofing material to guide water safely away from the chimney and into the roof’s drainage system. This overlapping design is key to keeping leaks at bay.
- Counterflashings: Once the base and step flashings are in place, counterflashings go on top. These metal pieces fit snugly into grooves cut into the chimney’s mortar joints to lock them in securely. They act as an extra waterproof shield, sealing the flashing system and making sure water stays out for the long haul.
- Saddle or Cricket (for Larger Chimneys): For bigger chimneys or areas that see a lot of rain or snow, a saddle or cricket might be added. This small, sloped structure sits behind the chimney to redirect water away from its base, preventing pooling and reducing the risk of leaks. It’s especially handy during heavy storms.
- Sealing and Final Inspection: Once all the components are installed, the entire system is sealed with top-notch caulking or roofing cement to reinforce the waterproofing. Finally, everything is inspected to make sure there are no gaps, loose pieces, or areas that need extra attention.
While this process sounds simple enough, it really does take skill and know-how to get it right. Even small mistakes—like misaligned pieces or poor sealing—can let water in and cause expensive damage down the line. That’s why it’s always a good idea to leave chimney flashing installation to experienced pros who know the ins and outs of roofing and waterproofing.

Common Issues with Chimney Flashing
Chimney flashing is essential for keeping your home safe from water damage by sealing the area where your chimney meets the roof. But despite its importance, flashing is prone to wear and tear, poor installation, and environmental factors that can lead to pesky roof leaks.
Roofers are often called in to fix these chimney-related problems, since faulty flashing can let water sneak into your home, causing damage to your roof, walls, or even your ceilings. Tackling these issues early can save you a lot of stress and expensive repairs down the line!
Here are some of the most common chimney flashing problems to watch out for:
Improper Installation:
A lot of flashing troubles come down to poor installation. Flashing that isn’t installed correctly can leave behind gaps, weak spots, or areas where water can easily find its way in. This can happen if the flashing isn’t secured tightly, if the wrong materials are used, or if the pieces aren’t overlapped properly.
Even small mistakes—like not accounting for the slope of the roof or skipping proper sealants—can lead to big issues. Unfortunately, if you hire an inexperienced or unqualified roofer, you’re more likely to face these problems.
Deterioration Over Time:
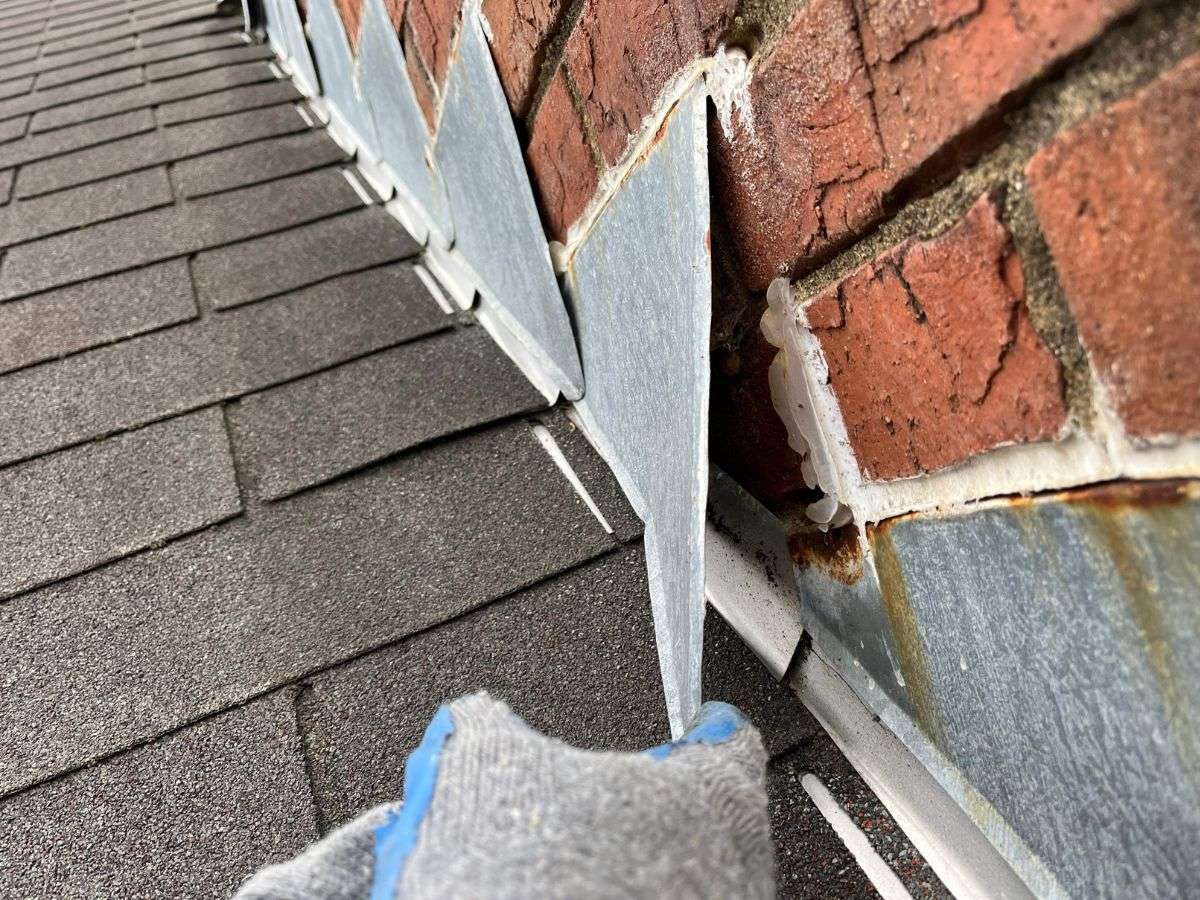
Like anything exposed to the weather, flashing can wear out over time. Sunlight, rain, snow, and temperature changes can all cause it to crack, corrode, or degrade. This is especially common in older homes where the flashing hasn’t been maintained or replaced in years.
Regular inspections and upkeep are key to catching these problems early. If maintenance is ignored, small leaks can turn into major headaches that require costly repairs.
Inadequate Sealing:
Flashing is meant to create a watertight barrier, but if it’s not sealed properly, it won’t do its job. This issue often pops up in older installations or in repairs done by someone without much experience. Gaps, not enough sealant, or poor adherence to the shape of the chimney and roof can all let water sneak in. This can be especially problematic in areas with heavy rain or snow, where water tends to pool and exploit these weak spots.
Material Incompatibility:
Not all flashing materials play well together! Using materials that don’t match the chimney or roofing can cause a range of problems. For instance, some metals expand or contract at different rates when the temperature changes, which can stress the flashing over time.
In some cases, chemical reactions between materials can lead to corrosion or weakening. Choosing the right materials for your roof and chimney is super important to ensure the flashing lasts and keeps leaks at bay.
Structural Problems with the Chimney:
Sometimes the flashing isn’t the problem—it’s the chimney itself. A poorly constructed or oddly designed chimney can make flashing issues worse. For example, a chimney that’s oversized or in the wrong spot on the roof can strain the flashing as time goes on.
A chimney without proper support may even shift or settle, pulling the flashing away from the roof. These structural problems can create gaps or misalignments, letting water get in and cause trouble.
Other Chimney-Related Issues:
Flashing isn’t the only part of the chimney that can lead to water problems. Cracks in the mortar, damaged siding, or issues with brick or stucco can all allow water to seep in. Sometimes, these leaks can mimic flashing problems, making it tricky to pinpoint the real source.
On top of that, a damaged chimney chase or cap can let water flow directly into the chimney, making things worse. That’s why it’s always a good idea to inspect the whole chimney system to ensure everything is in good shape.
By staying on top of these common issues, you can help protect your home from water damage and keep your chimney in tip-top shape!

Why Regular Maintenance Matters
Keeping your chimney flashings in top shape is key to protecting your home. These flashings act as a water barrier, stopping leaks where your chimney meets the roof. That’s why it’s a good idea to inspect them regularly—at least once a year and after big storms or heavy snowfall. Check for things like cracks, loose edges, or rust that might weaken their ability to keep water out.
Catching small issues early, like minor leaks, can save you from bigger headaches down the road, such as water damage, mold, or structural problems. With a little consistent care, you can keep your chimney and roof in great condition for years to come.
Need Help with Your Chimney Flashing? Call in the Pros!
Your chimney flashings are a big deal when it comes to preventing leaks and water damage. But they need proper installation, regular checkups, and quick fixes to do their job right. If you’ve noticed leaks or think something might be wrong, don’t wait!
At Roof MD, we’re experts in tackling chimney leaks and flashing issues. Homeowners in Tennessee and Georgia trust us to deliver reliable, top-notch roofing services.
Need a hand? Contact Roof MD today to schedule a free roof inspection. Let us help you keep water out and your chimney flashing in perfect shape!
